This series of posts was inspired by porterhau5’s work that can be found here: Extending BloodHound: Track and Visualize Your Compromise.
1. The Problem
In a standard Active Directory assessment, a fundamental phase is the analysis of Group Policy Objects (GPOs). Usually, this activity is aimed at identifying the following:
- Opportunities for lateral movement via misconfigurations of remote access policies and UAC1;
- Misconfigurations that could allow further compromise, such as lack of SMB signing;
- Password policies;
- Privilege Assignment;
- Local group membership.
…and much more. The process of parsing GPOs is often tedious and very time consuming. Tools like Grouper22 can drastically reduce the required time, but the volume of the output is still quite considerable.
What we needed was something that could be easily integrated with the current tooling that would help us understanding the current environment quickly.
In this first part, we’re going to focus on privilege assignment via GPO and SMB signing settings.
2. The Solution
PowerView offers an extremely handy cmdlet called Get-DomainPolicyData that does all the heavy-lifting for us. In a nutshell, what the aforementioned cmdlet does is parsing all the setting specified by GPOs and return PowerShell objects that represent them:
Get-DomainPolicyData -Policy all -Server dc01.hacker.lab -Domain hacker.lab
 -Credential $cred

PowerShell gives you the ability of exporting an object into an XML file that can be re-imported later or parsed by other tools. Just append | Export-CliXML gpo.xml at the end of the previous command.
What we did was building a parser for that XML object that can also interface with BloodHound via the neo4j driver and augment the dataset with some useful information. More specifically, for each GPO that was configuring a dangerous setting (more on this later) we gathered all the users and computers that were affected by that GPO and modified their objects or added new relationships.
For example, as we already said, within GPOs it is possible to assign special privileges to security principals. This is also known as User Right Assignment (URA):
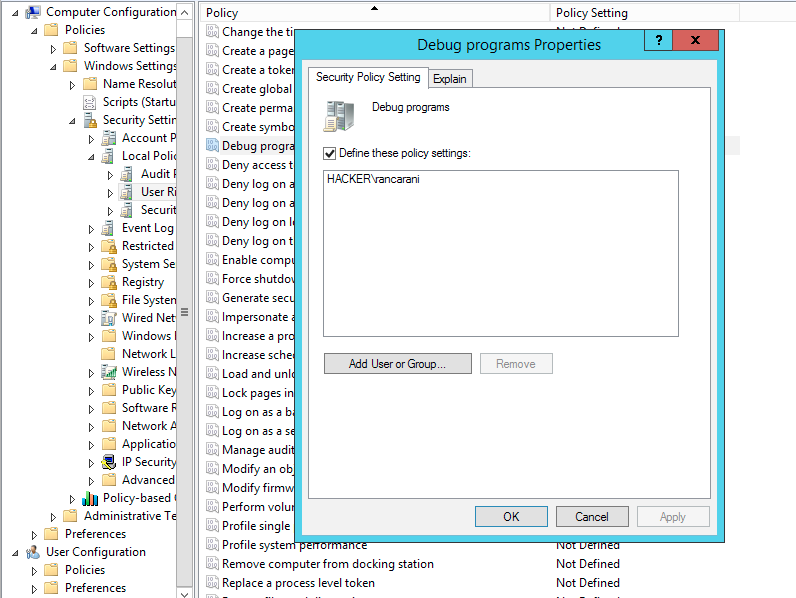
URA can have different purposes and can be effectively used to limit lateral movement opportunities. However, it is also possible that a misconfiguration within the privilege assignment will open new avenues for privilege escalation. Andrea Pierini’s research3 on this topic is outstanding and definitely recommended.
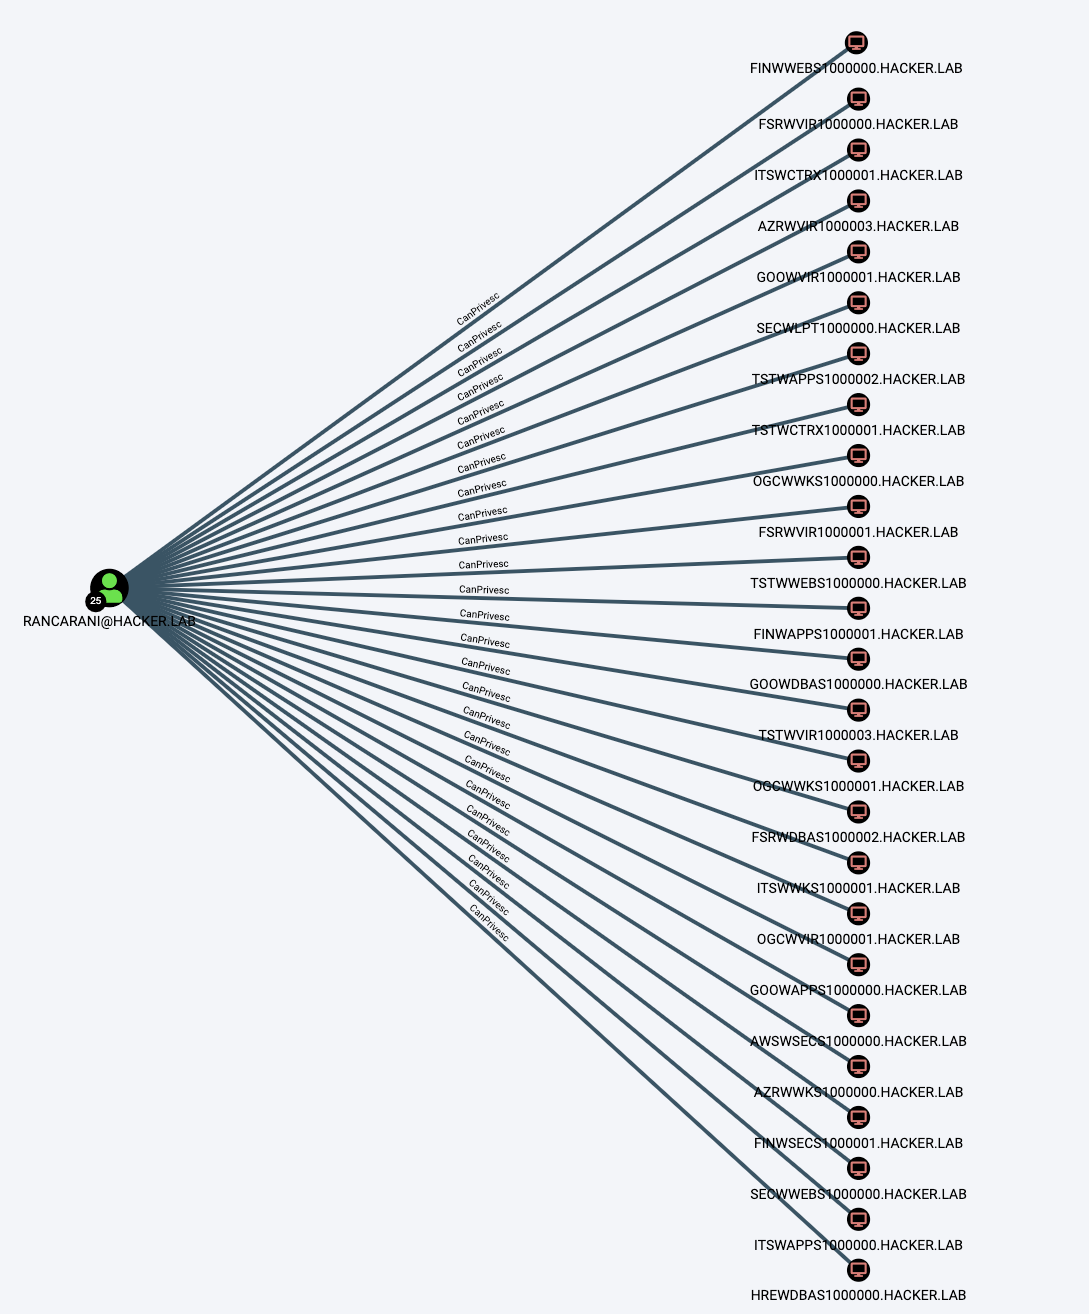
Combining the information that we gathered from PowerView on privilege assignment to specific SIDs and a list of dangerous privileges that can be abused to perform privilege escalation, we could easily create new relationships within BloodHound that indicates the ability to escalate to SYSTEM:
Within the exported XML, information about privilege assignment is shown as below:
<Obj N="PrivilegeRights" RefId="13">
        <TNRef RefId="0" />
        <MS>
          <S N="SeDebugPrivilege">*S-1-5-21-1559558046-1467622633-168486225-1104</S>
        </MS>
      </Obj>
It would be then possible to extract the SID of the principal to which the privilege was assigned to.
The cypher query that our script runs under the hood is something like the following:
MATCH (u {objectsid: $sid}) WITH u
MATCH (g:GPO {guid: $GpoName}) WITH u,g
OPTIONAL MATCH (g)-[r1:GpLink {enforced:false}]->(container1) WITH u,g,container1
OPTIONAL MATCH (g)-[r2:GpLink {enforced:true}]->(container2) WITH u,g,container1,container2
OPTIONAL MATCH p1 = (g)-[r1:GpLink]->(container1)-[r2:Contains*1..]->(n1:Computer) WHERE NONE(x in NODES(p1) WHERE x.blocksinheritance = true AND LABELS(x) = 'OU') WITH u,g,p1,container2,n1
OPTIONAL MATCH p2 = (g)-[r1:GpLink]->(container2)-[r2:Contains*1..]->(n2:Computer) WITH u,n1,n2
MATCH (n1), (n2) WITH collect(n1) + collect(n2) AS computers,u
UNWIND computers as c WITH c,u
CREATE (u)-[:CanPrivesc]->(c)
RETURN count(c)
What the cypher query does, is basically take the GUID of the target GPO, search for all the OUs (thanks BloodHound query debug mode) affected by the GPO and for each one of them extract all the computer objects. The query then creates a relationship between the user that has the specified SID and every computer affected by the GPO.
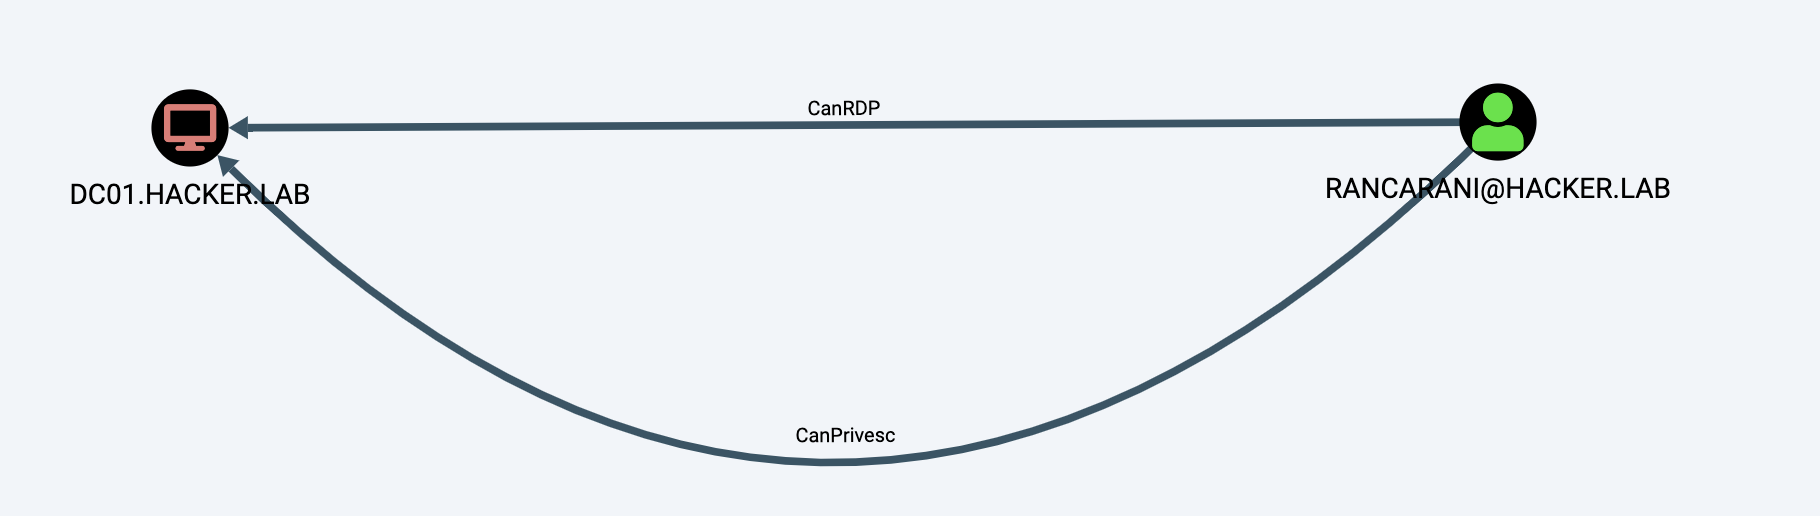
This would allow us to hunt for machines where we can RDP into and then privesc via URA:
The current privileges that the script checks for are the following:
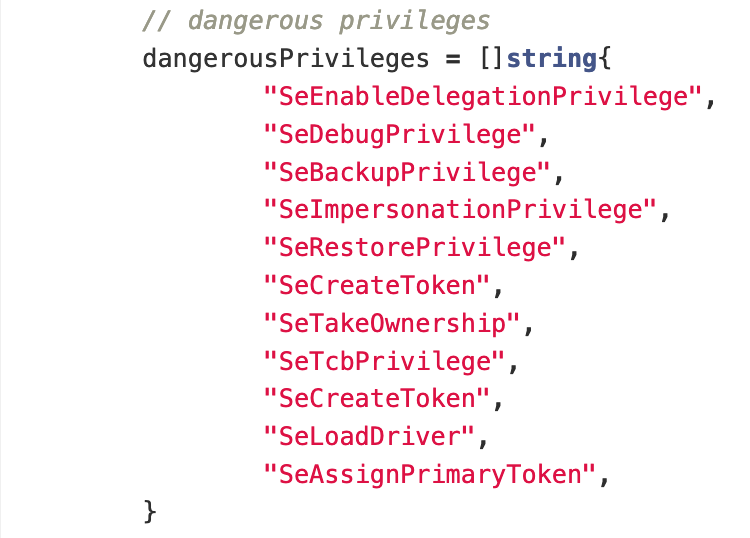
It must be noted that SeEnableDelegationPrivilege does not technically allow a local privesc, but if misconfigured could lead to the complete domain compromise4. I’ll fix that as soon as I have some time.
A similar approach was taken to identify computers with SMB signing disabled. It was possible to look for specific registry keys that were configured within the exported GPOs:
<Obj N="MACHINE\System\CurrentControlSet\Services\LanManServer\Parameters\EnableSecuritySignature" RefId="12">
            <TNRef RefId="1" />
            <LST>
              <S>4</S>
              <S>0</S>
            </LST>
          </Obj>
Once identified the GPOs that disabled SMB signing, it was possible to build a cypher query that set the signing object attribute to false in every computer affected by the vulnerable GPO:
MATCH (g:GPO {guid: $GpoName}) WITH g
OPTIONAL MATCH (g)-[r1:GpLink {enforced:false}]->(container1) WITH g,container1
OPTIONAL MATCH (g)-[r2:GpLink {enforced:true}]->(container2) WITH g,container1,container2
OPTIONAL MATCH p1 = (g)-[r1:GpLink]->(container1)-[r2:Contains*1..]->(n1:Computer) WHERE NONE(x in NODES(p1) WHERE x.blocksinheritance = true AND LABELS(x) = 'OU') WITH g,p1,container2,n1
OPTIONAL MATCH p2 = (g)-[r1:GpLink]->(container2)-[r2:Contains*1..]->(n2:Computer) WITH n1,n2
MATCH (n1), (n2) WITH collect(n1) + collect(n2) AS computers WITH computers
UNWIND computers as c WITH c
SET c.signing = false
RETURN count(c)
This information could be used to choose targets to perform NTLM relay attacks.
3. Usage
Usage is quite simple, to export the GPOs using PowerView:
Get-DomainPolicyData -Policy All | export-CliXML gpo.xml
We then need to convert the file from UTF-16 to UTF-8, as Go libraries for XML parsing don’t like that and I don’t want to bother doing it manually:
iconv -f utf-16 -t utf-8 gpo.xml > parseg-gpo.txt
Runnig the tool is as easy as:
NEO4J_USER=neo4j NEO4J_PASSWORD=bloodhound NEO4J_SERVER=localhost ./power-gpo-parser --gpo parsed-gpo.txt --bloodhound
Where:
--gpoindicates the GPO export to parse;--bloodhoundindicates to interact with bloodhound using the connection data specified within the environment variables shown in the example above.
Interacting with BloodHound is not necessary, if you omit the --bloodhound flag the tool will just output the various findings.
NOTE: The output includes some misconfigurations of remote access policies and UAC, but that information is not included within BloodHound at the moment.
4. Building the Tool
NOTE: The source is not public yet! I need to polish it a little bit before showing the world how bad I am with Go.
Installation is quite simple:
# see https://github.com/neo4j/neo4j-go-driver#requirements-1
brew install michael-simons/homebrew-seabolt/seabolt

# cloning the repo
git clone https://gitlab.com/riccardo.ancarani94/power-gpo-parser.git
cd power-gpo-parser

# go stuff
export GOPATH=$(pwd)
go get -v github.com/neo4j/neo4j-go-driver/neo4j
cd src/power-gpo-parser

# install
go install
If everything went find, you should find the compiled binary under power-gpo-parser/bin.